Wednesday 29 December 2010

Garage Talk

For those of you who have visited Trayna's blog you will have seen the shuttle she has just purchased and have read all about the particular wood.   Trayna lives in the far north whilst we are down in the south of the country. There is very little of this wood so, as and when, a few shuttles will be put into Jane's shop.   This one was made for me and the markings obviously differ from shuttle to shuttle.  It had a little trip outside to bask in the Winter snow!


As you should all know by now  'Im in the garage' is my other half, whose workshop is in the garage.
Before Christmas my youngest son visited us and asked for something to be made, previous to that I had requested a set of tatting trays.  So there was a lot of friendly banter on whose woodworking project should take priority. My request was this set of trays, the idea came whilst visiting a shop and I took a photo of them on the left, it was being sold in the bathroom and bedroom department of the store.  It seemed a good idea to put tatting objects on and be able to carry it around the house without loosing things on the way.  So my request is what you see on the right, the trays are not so deep, and a little wider, as I didn't want to clutter them up with unnecessary objects. Unfortunately the photograph doesn't do it justice (it is the angle I have taken it) as it appears to have different sized trays whereas they are all the same size, with the bottom one being slightly deeper.  It is tall enough to have by a chair and work from.  I have only just started using it, that is why it looks tidy. I'm not quite sure what I want to keep on it but hope to mainly use it for current projects instead of having them spread everywhere, whilst the rest of the thread, shuttles beads etc live in another place.

My son also got his wish and this was made for his Christmas present.  It is not a game, but for storage of particular items, I wonder if you can guess?  The inlay is ebony and holly wood which comes from his late grandfathers' garden.   Due to his car and himself being poorly we were unable to see him over Christmas and  so what you see below is still wrapped up in Christmas paper.  He is off to Mexico tomorrow for a holiday so not sure when it will be in his possession.  So much for the priority of it being made!


With all these projects there has not been much time to make shuttles, but a few will be heading towards Janes' home soon.  Will keep you up-to-date with their journey.
Friday 24 December 2010

Decorations

As I would imagine with everyone who makes tatted gifts for friends and relations at Christmas,  unless they have been very well prepared in advance, time runs out and it means a frantic dive into stash or making something very simple.  I went to a friends house this week and she had all the tatted pieces that I had made over the years displayed and I hardly recognized them, rarely do I keep any examples myself.   I made these three very quickly as time just ran out!

The churches are decorated for Christmas 


At home we have the Christmas Pyramid out


Complete with figures including a cherub band


A German Oompah Band


A Vicar and choir


And an African Nativity Scene


As you can see when the candles are alight they all go round and round! 


A Very Happy and 
Blessed Christmas to everyone

Saturday 18 December 2010

Ring out those Bells!


The person that makes the card inserts for the pop-a-bobbin shuttles is an ex-printer and is an absolute genius when it comes to anything to do with printing. His name is Mr. Bell and of course he is married to Mrs. Bell, so with that in mind I have tatted them some bells!

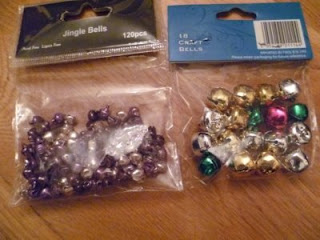
The pattern is Yarnplayer's joyful bell pattern with beads plus the addition of tiny bells which I purchased awhile back, recently I bought the bigger ones you see in the picture, but not sure what to do with them yet.  It is a quick and easy pattern but so effective, thank you Marilee.


Three of our churches have bells but they do not have bell towers. This picture shows some ancient clangers that are on the wall of one of them, they are said to be from the 13th century.


Now the rope that you see bell ringers holding on to as they ring the bell has a coloured piece called a "sally".  This Sally used to be a bell ringer  at a very famous church and below is a very old photograph to proof it.  

                              Can you spot which one is me?

This time next week the bells will be ringing out to celebrate Christmas.


Monday 13 December 2010

Shuttles and Christmas Trees

Just to let you know that Jane is going to be selling a variety of shuttles in her Etsy shop tomorrow, the holly ones, which were on my previous blog and these larger shuttles, one with a hook and the other without a hook. As you can see they are all dressed up for Christmas!  I'm in the garage has been very busy and although the garage is so very cold, he is planning on making more shuttles in the next few weeks.  But is anyone interested? Not sure if there is a demand for wooden shuttles at the moment.

Here are some of Jane's Christmas Tree ear rings which I started years ago and have recently found in a box.  They are all at various stages of construction, but as you can see the two that are finished are not even identical! Really must either finish them off, or probably best if I abandon them all together as I'm not sure if I have the thread anymore.  Strange though I did take one completed pair to a Christmas Fayre recently and sold them before the event had even opened!  Also not particularly pleased with the quality of the tatting, the deciding factor - start again!

Wednesday 8 December 2010

Hollywood Close


"I'm in the garage" - a very very cold garage, has spent the last few weeks making these post shuttles.  Sadly though it doesn't look like they will make Christmas for those of you who live over the pond.


You may have spotted these shuttles in my new profile picture. The picture was taken before the snow disappeared.  In fact the snow had really turned to ice and they kept sliding like little toboggans!   The ones with two sprigs of holly on them are a little larger,  3 inches long as opposed to 2 1/2 inches. 


The larger ones do not appear so shiny because they have only just had their sprigs of holly put on them, the finished ones will look smoother and shinier.   This street name is a short walk from where I live and by coincidence a person I know lives there who tats!

Not the famous Hollywood in the USA!


All these post shuttles and some pop-a-bobbin shuttles will be on their way to Jane over the weekend, not by mail - because if you have been following her blog you will know that the Royal Mail is not very reliable at the moment.   Therefore it will not be until next week before she will get them into her Etsy Shop.


This particular holly wood came from our late father's garden so before all of it goes Jane and I must have a shuttle or two made from the wood.

Saturday 4 December 2010

Patterns

One of the delights of having a blog is being able to share patterns with others, and thank you to all who do post such wonderful patterns, there are so many talented people who are generous in this respect.  I have only put very few on my blog over the past year and have never seen any of them actually tatted by someone else.  This could be because my instructions are difficult to understand, which rather scares me, I wouldn't want that to happen. Or of course no one has got around to making them yet, which is very understandable as there are so many other much better patterns out there to choose from.


Snow and ice slowed things up here in England over the past two days, which meant that as I couldn't get the car out so the funeral director had to pick me up and take me to the crematorium to conduct a funeral service yesterday.  I didn't want to risk having an accident and not getting there on time, or not at all.    So when I arrived home I was able to spend a fruitful half hour or so looking at the blogs and went to Gina's blog and found this snowflake, and then popped across to Spulni-Blog
I was so impressed with the design and then when Gina added beads, well I decided to add more, especially since receiving 20 packets in the post!  Also I changed it very slightly.
But is that right should we do this to people's designs?  It feels like we are being critical, or it could be classed as imagination?    


The blue snowflake was my first attempt but it was a bit squashed in the middle.  
Thank you to Orsi and Gina.

Wednesday 1 December 2010

Three Button Necklaces

Thanks to Jane's help I have at last written this pattern out.   

Just can't give this one away, the thread is beautiful and was given to me by Sue Anna.

The yellow one has Swaroyski beads in it .

BUTTON NECKLACE © Sally Kerson 2010


Abbreviations: R ring
Ch chain
Cl close
p picot
BP long bead picot
p very small picot
R split ring
RW reverse work
+ join
B bead
Cl close
Btn button
DNRW do not reverse work
SLT Shoe lace trick
T & C tie and cut

Materials required: size 20 thread, 14 buttons, seed beads, 14 larger beads, necklace findings

Wind 2 shuttles with thread, adding 14 beads to shuttle 1, the rest of the beads are added as the necklace is worked

Bottom half of necklace
Sh 1 attach to finding with 1 ds take sh 2 and do the same
SR1: 5 – 1 / 5 – 1 Cl
SR2: 1 + SR1 4 – 1 / 1 + SR1 4 - 1 Cl
SR3: 1 + SR2 4 – 1 / 1 + SR 2 4 - 1 Cl
SR4: 1 + SR3 5 / 1 + SR3 5 Cl   (Fig 1)
Move B on shuttle 1 along to last SR before starting
R1: 3 vsp 3 + 1st btn hole 6 Cl rw
Ch: 6 LBP (5B) 3 rw
R2:* 6 + 2nd btn 6 Cl rw
Ch: 3 + LBP on last chain, 3 LBP (7B) 1 + LBP 3, LBP (5B) 3 rw
R3: 6 + 2nd btn hole 6 cl rw
Ch: 3 + LBP on last chain, 3 LBP (3B) 3 rw
R4: 6 + 3rd btn hole 3 vsp 3 cl move bead from shuttle 1 DNRW
R5: 3 vsp 3 + next button 6 cl rw
Ch: 3 + LBP on last chain, 3 LBP (5) 3 rw  (Fig 2)
REPEAT FROM R2* 13 more times until R3
Ch: 3 + LBP on last chain, 6 rw
R 4: 6 + 3rd btn hole 3 vsp 3 cl move bead from shuttle 1DNRW
SR5: 4 – 1 / 4 – 1 Cl
SR6: 1 + SR5 4 – 1 / 1 + SR5 4 – 1 Cl
SR7: 1 + SR6 4 – 1 / 1 + SR6 4 – 1 Cl
SR8: 1 + SR6 5 attach finding / 1 + SR 6 5 cl T & C

Top half of necklace (when necklace is finished each button hole is joined into twice
R1: 6 + btn hole with last SR attached to it 4 + vsp 6 Cl SLT rw
Ch: 4 *
R2: 4 + 4th btn hole 4 (last btn hole remaining without a join) Cl rw
Ch: 4 rw
R3: 4 + 4th btn hole 4 Cl rw
Ch: 4 rw
R4: 6 + next btn hole 4 + vsp on SR between btns 6 Cl rw
Ch: 6 rw
R5: 6 + vsp on next SR between btn 4 + btn hole 6 Cl rw  (Fig 3)
REPEAT FROM Ch 4 *.to R4 then 6 + into final btn hole 4 + vsp on last SR 6 CL T & C.