One of the problems when writing a tatting pattern to be used with a bauble or button is that even with the best will in the world, it is not always easy to find a universal pattern that fits all, even measuring buttons and baubles does not always work! Threads can also vary, not to mention every ones different tatting tension. So I've tried my best with this pattern and just ask that if you use it, then test it first and alter your stitch count accordingly, especially if it is not a cosy fit over the bauble. When you have finished the pattern the bauble cover should look something like this.
Materials required:
I have so many projects (tatting and otherwise) on the go at the moment, but hopefully should have completed some of them in a few weeks time.
It is then placed over the bauble like this
And assembled by threading a separate piece of thread through the bugle beads
Finally the beads to decorate and hide where the threads are pulled up, are added
The pattern:
Materials required:
Seed
beads
20
thread (or you can use 40 or 50)
small
bauble (circumference approx 3 1/2")
SCMR
self closing mock ring
R
ring
SR
split ring
P
picot
VLP
very long picot
Roch
Ring on chain
LCh
Lock Chain
Sh
1 shuttle one
Sh
2 shuttle two
Wind
2 shuttles with the continuous thread method
Add
1 B Sh 1
20
B Sh 2
SCMR
ch 5 B 5 *(2 B @ back hand before starting )
R
4 B 4 – 4 B 4
ch
5 B 5 repeat from * 3 times Cl SCMR
SR
1 B @ back of hand before starting 4 B 4 / 4 B 4 cl bring a bead
from the shuttle thread and pass the other shuttle thread through it
continue with
LCh:
*6 Roch 6 VLP add bugle beads take bead from core thread move into
ring and attach VLP to other side 6 Cl
LCH
6 + B on ring of round 1 repeat * 4 times
attach
to base of SR
To
complete fit over the bauble and thread a piece of tatting cotton
through the gap made between one of the sets of bugle beads (five
gaps 10 bugle beads altogether) continue through the rest of them and
draw up tight then add a large bead or beads, thread more cotton
through the pulled up beads and through the dangle beads, knot close
to the beads making a tassel.
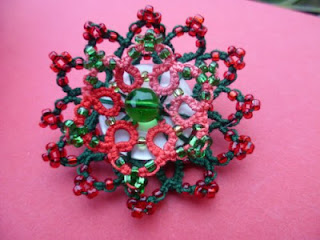
I have also made a couple of Jane's button brooches and as you can see they vary from hers because of the button size and tension
Some of these holly shuttles will be on sale soon


Oh!!! Thank you for writing this up and sharing it!!! My mother will be so happy.
ReplyDeleteWhat an excellent tutorial! I have indeed been 'running around' to all the stores (good exercise!) on a search for the perfect size bauble. I took the clear one you had sent me back in 2010 (carefully put it in my purse!), and of course I can find only those that are a bit larger or smaller. I bought some slightly smaller ones, so we'll see how they work out.
ReplyDeleteAnd in addition to writing up the instructions for the baubles (thanks SO much!), you managed to tat TWO of Jane's button brooches. They are spectacular!!! I want to try making those as well! I've avoided beads for years, and now I'm starting my collection! May not be a good thing!! Addiction ahead! But first I have to get comfortable tatting with them! I do have a small, neglected button collection, which can now come out of hiding!
The thread and bead colour for the bauble are well chosen. I quite like it.
ReplyDeleteAh, you are right. Your button does look a little different from Jane's but the colours are so festive. Pretty.
Thanks so much for the directions. Yes, a tatter has to take variations into account, but we need a guide!
ReplyDeleteLovely pattern and thank you for sharing it, vernon cleared the roof out last week and all the Christmas babbles were thrown away as we don't have a tree anymore,
ReplyDeleteLovely brooches, I love the colours you used.
Margaret
Oh how awesome everything looks!!! :)
ReplyDeleteThank you for sharing your pattern, I think I will have a go at making a Christmas ball as a beginner it will be a challenge
ReplyDeleteSusan x
Hi Sally,
ReplyDeleteCame over to see your button brooches - they are really pretty! I can see how these could become addictive!
Beautiful tatting!!!
ReplyDelete